11.22.2015

The frog: your story

This is a manga-like comic I have drawn for you. I don't really know how I should name it but well... even the characters have no real names yet (Do you have suggestions?). Ok first of all about the style. It is very different from normal manga or comic styles but I really like it. The focus is on the characters and their feelings what is the reason why I use chibi emotions sometimes. I won't be drawing many backgrounds but maybe there wil be someday...
Well the story ist mainly about four fantasy characters: a nymph, who is first of all the most grown up and realistic person - but she's also a bit uppish, a fairy, who is very lovely and kind but also a bit childish and rash sometimes, a mermaid, who is very mysterious and curious and also a demon, who is not that evil but more sassy and a bit sneaky but not a bad person at all.
So the main point is that I'll be drawing 2 pages everytime and you can write comments what you think will be happening or should be happening next. Be creative and influence the story by giving suggestions. You can even change the character's additudes if you want to. This is a project I really, really want to realize: that the community and I will be making a really funny and surprising story TOGETHER.
So, let's get started!


11.17.2015

Drawing heads

You wanna know how to draw manga? Tody I'll show you how to draw heads and circles. All you need is good sketching paper, your favourite pencil (about 2B) and an eraser.

1. You start with a circle first. Here are three possibilities to draw circles. Practise really helps to make good circles! Use the method you're the best at.

1. Take the pencil and shape a circle by moving only your shoulder, nor your hand or your arm. You're getting many, soft lines you can easily erase. I'd suggest to use this method only when you're drawing bigger sketches, else it is a bit tricky to find out which line belongs to what when you're inking it.


2. Use flicking motions in a circular shape by moving your fingers and your hand. You gonna need good eye-hand koordination and a good imagination of what a perfect circle looks like for this. You'll get almost one straight line when you're good at this. It's not too soft but also not too harsh.


3. The third one would be that you draw a circle in one continued line but this is most tricky and the line might be too harsh to erase and correct it more than twice. Even I had to correct the right half of it by using the second method.


2. Now you draw a line to mark the half of the face. Draw it a bit longer than the circle, because the chinn is going to be there. Watch out for the perspective here!

1. Front: the half of the face is exactly the half of the circle.


2. Half-side: The line starts at the same point as in the front perspective, curves down 'till it meets the circle again. Then the curve goes down more straight.


3. Side: the line for the nose and the chinn has also the same start point and follows the outline of the circle to end like a straight line. It almost looks like a 'P'


3. It is time to shape the chin. This is the point where you have to think about how the charakter looks like, but I'll make another post for different shapes someday.

1. Front: try to make both lines as symetrical as possible. This is an example for a teenage boy.

2. Half-side: on the backside you see the cheeks and a little curve where the eyes are going to be (where the line crosses the circle)

3. Side: This perspective has something strange because in the others you see organic forms and this one is like totally flat.


4. Position of eyes, nose, lips and neck and ears is almost the same: The horizontal line for the eyes is right in the middle of the face, the nose ends half way from the horizontal line to the chin and the mouth is the half way down again. This is also on the same level as the jawbone. The ears can be from the horizontal line to the mouth, depends on your character. I mostly draw these from the eyes to the nose.

1. Front: the nose ends exactly where the circle crosses the line at the half of the face. The neck starts just a little bit besides the jawbone.

2. Half-side: The neck starts behind the ear, where the horizontal line meets the circle and a little bit besides the chin.

3. Side: The ear is a little bit behind the half of the circle, the neck starts where the circle and the chin-line are meeting and on the half way from the circle's half-line and the chin. It does not go straight down, it goes a bit to the backside.


5. Now you can draw the face more detailled but you have to watch out at certain areas:

1. Front: make sure: the eyes don't start right at the sides of the face and also leave the space for one third eye between both eyes!


2. Half-side: The eye at the backside is smaller, but you can see where the lashlines end.


3. Side: The nose bows in where the eyes are, the chin is a bit behind the vertical line of the face and you can see the lips! Make sure to leave a half eye-sized gap between the bow of the nose and the eye. 


If you have questiones or wishes, leave a comment below!

11.03.2015

My sketchbook

I posted this on my first blog CcC first... He - is - so - handsome! This shows my love for asia and pirates *grin*
I have to admit the pretty wierd pose... I think he's supposed to be attacked from behind and easily block that while he's getting ready to fight someone in front of him or something...


This is one of my first manga drawings. He's also handsome *grin*. It's inspired by Midnight of Fairy Tail (I just love his hairstyle).


Here I drew Decim from the anime Death Parade. He's my favourite character and also handsome. I love his hairs and eyes :)
Since my old sketchbook is full of sketches I got a new one! And I also got some Copic markers. I hope I'll get good at drawing sometimes so I can show you more nice drawings.

10.28.2015

Christmas gifts for you

On my other blog I already posted a post where you can win posters of Seungri of BigBang or G-Dragon and a manga!
The post is on german but you can easily translate with google.
If you are interested, follow that Link:
->my other blog

10.10.2015

DIY: eye patch (easy)

This is my second halloween DIY for one of my halloween looks. As you must have recognized the make-up I was doing wasn't uploaded yet. There's a simply reason for this: the edit crashed and now the video is a bit broken. I already uploaded it on YouTube but it's private for now. I'm thinking of doing the tutoial one more time but I won't have time for this before november. So I'm asking you if I should set the broken one public so you at last have a guide. Please tell me in the comments!

Now I should start with the DIY:
This is the eye patch of a character I created for a story I'm writing which is kind of similar to Another's Mei Misaki (or Misaki Mei, I don't exactly know) which is also my favourite character. So if you want to cosplay her sometime you easily can make the eye patch yourself!
So this is what you need for this:

  • elastic band
  • cosmetic cotton pads
  • hot or fabric glue
  • white fabric or flet
1. Take two cotton pads and cut two 3x3cm squares


2. Take white fabric or flet and cut two squares which are a little bit bigger than the others.


3. Glue the two cotton squares in the middle of one square of the flet.


4. Now look how long your elastic band should be so you can put it around your ears. Glue the ends on the flet like this:


5. Try it on and mark where you have to glue on the elastic on the upper side.

6. At last glue the other flet on top and you're done!


A variation is the eye patch of a pirate. Therefore you just need other shape, black flet or fabric and a black band:


Next weekend I'll be doing another halloween DIY!

10.03.2015

DIY: bat mask (easy)

It's already october so I wanted to do some Halloween DIYs. I just forgot that today is a holiday in germany so i couldn't buy special things to do those. So for today I'm going to use what I already have to create a mask for my following make-up "Vampire Lady" which I'll be doing tomorrow.

What you need:

  • paper and a pencil
  • scissor for Paper
  • tiny scissor
  • cutter
  • glue
  • cardboard (stable)
  • black cardboard or black foam
  • sequins in black and other colours you like
If you want to fix the mask with a headbend you also need elastic but I decided to use a stick because it doesn't squeeze my hair. If you want to create the same bat like me follow the link below and print the image on the entire page or the PDF in the actually size.
You don't need to have an account on dropbox for this, you can just skip the log-in and download it. On the top there is the shape for the bat and below it is the shape I started with if you want your mask look different.
So let's start with the first step! You can skip the first parts if you use the download.

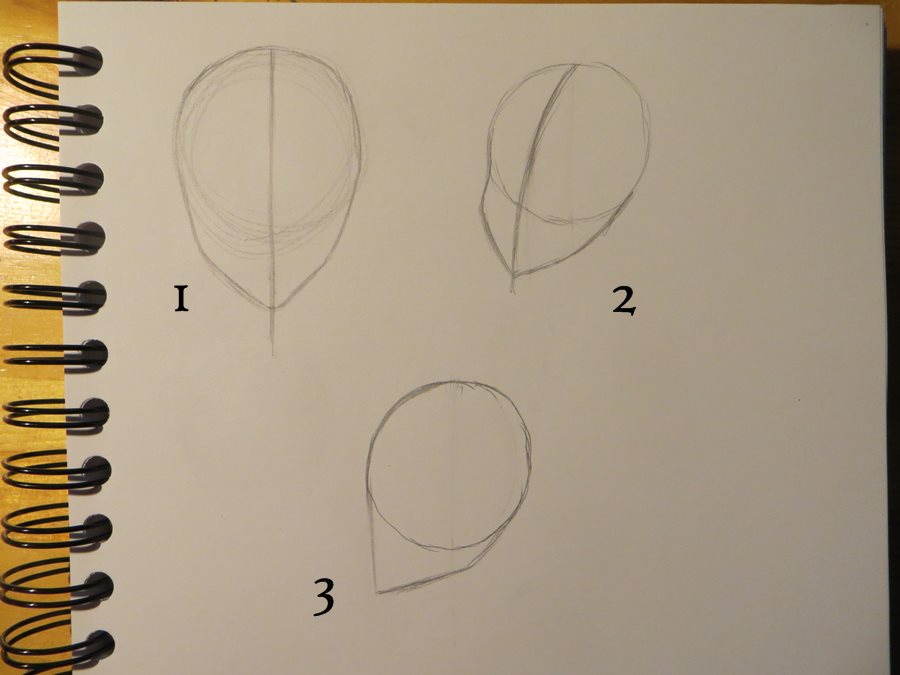
1. Print the shape of the mask or draw one yourself and cut it out. Hold it in front of your face so you know if you have correct the shape, size or the eyes.
This is the shape I started with:


2. I drew that on a second paper so I easily could change the shape and create a bat. I also made the eyes bigger so I can see better when I have it on.


3. Fold it half so both sides of your mask look the same, then cut it out.

4. If you want to use a cutter to cut out the eyes then make sure to practise first because it is a bit tricky. If your cutter skills are worse like mine, cut out a little shape in the middle of the eye and cut it out with a tiny scissor.


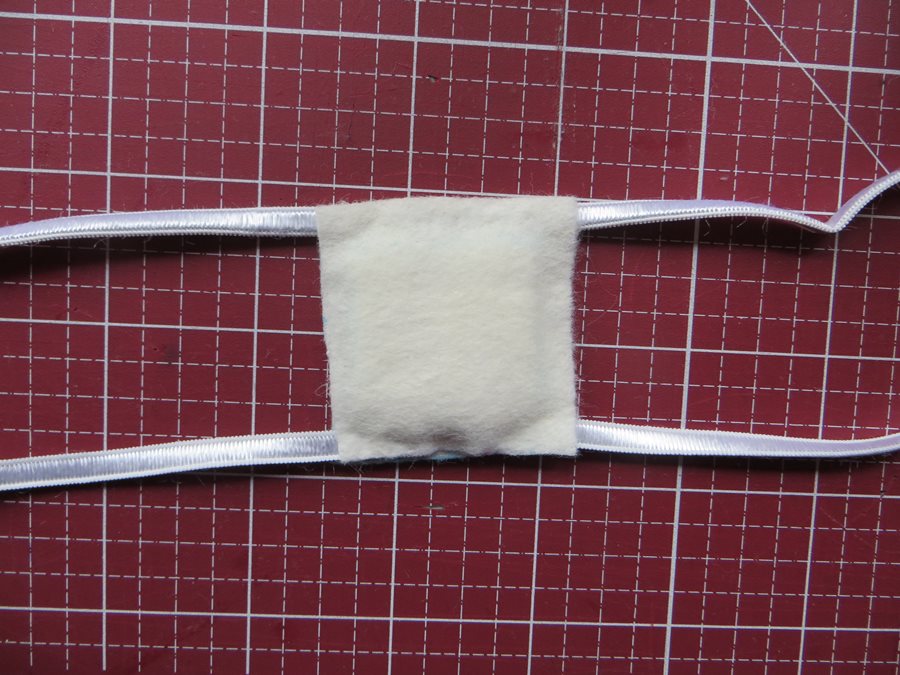
5. Cut a bat out of the stable cardboard and one out of the black cardboard or the foam, which I was using. 


6. Glue it together. Make sure that it looks good and no part of the stable cardboard looks out, then let it dry for a few minutes. If you're using a headbend glue it between the both bats so you can't see the elastic.

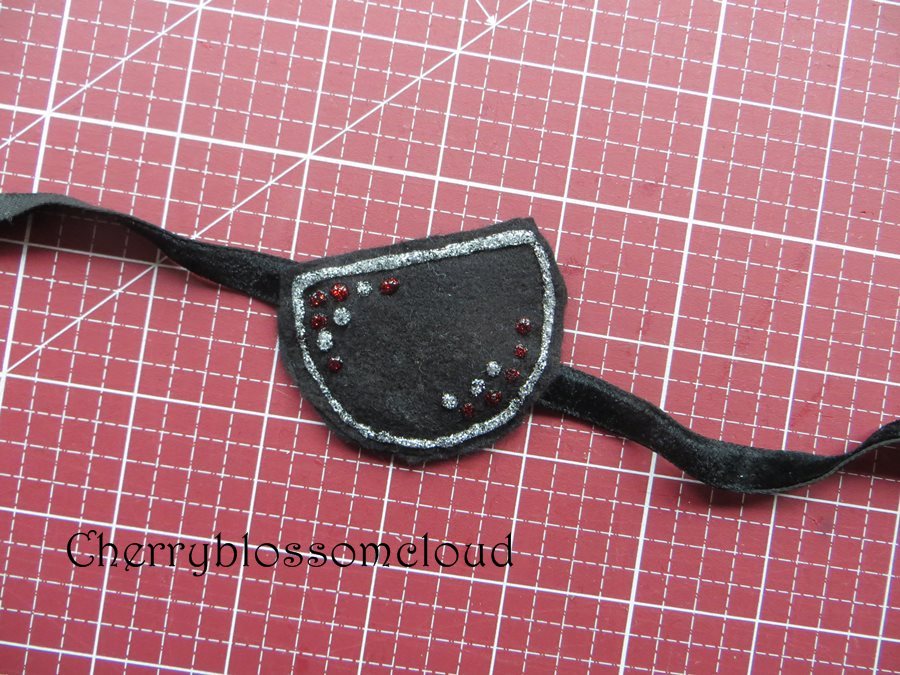
7. Pimp the mask with sequins or whatever you like to use.


8. Normally you would glue the stab on the back now, but since i couln't go to the supermarket to buy some I must wait till next week...

Now you're done! This is a really easy DIY, just to glue all these sequins on really does take a lot of time. If I had gel glitter I also woul've given the bat teeth and eyes :/
Tomorrow I'll be filming the make-up which is matching this mask. Honestly, it will be the first time for me to do the entire make-up. Normally I just draw my eyes or use some powder, but I hope it will work!

Let me know if you want to do this DIY too ;)

9.16.2015

Cupcake skirt

I'd like to show you my new skirt. It was also a part from the shooting last time ;)

Photos by facile et beau - Gusta
Sewing by me and Gusta


Let me know what you think of it. I think it's really cute!

My first Lolita dress

Hi, everyone! I did a shooting with my lolita dress on monday! I'd like to show you the most wondeful pictures I've got.

Photos by facile et beau - Gusta
Design by Luma (me)
Sewing by Gusta & me


Let me know if you have a good name for the dress because I've no idea.


I hope you like it! Please let me know what you think of this lolita dress in the comments. You also can leave a comment if you don't have an account.